
1 / 3
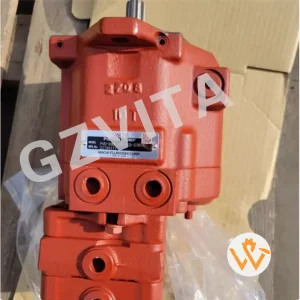
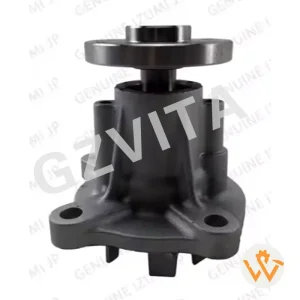
Installing a water pump is a critical task in maintaining the cooling system of an engine, including those found in vehicles like tractors and heavy machinery. Here are some important notes and steps to consider during the installation of a water pump:
Ensure the engine is turned off and cool before starting the installation. Disconnect the battery to prevent any electrical issues.
You will need basic hand tools (wrenches, sockets, screwdrivers), a torque wrench, a gasket scraper, and possibly a sealant. Have the new water pump and gaskets ready.
Always refer to the specific service manual for your engine model (e.g., 4GJ1, 6HK1) for detailed instructions, torque specifications, and specific procedures.
Before removing the old water pump, drain the coolant from the radiator and engine block into a suitable container to prevent spills.
Disconnect any hoses connected to the water pump. Remove the bolts securing the pump to the engine block. Carefully take out the old pump, ensuring that any old gasket material is removed from the mounting surface.
Check the condition of the hoses, clamps, and other components connected to the water pump. Replace any worn or damaged parts as necessary.
If the new water pump requires a gasket, apply a thin layer of gasket sealant to the mating surface. If it uses an O-ring, ensure it is properly seated.
Position the new water pump onto the engine block, aligning it with the bolt holes. Hand-tighten the bolts to hold it in place.
Using a torque wrench, tighten the bolts to the specifications provided in the service manual. Follow the recommended tightening sequence to ensure even pressure.
Reattach any hoses and clamps to the water pump. Ensure that all connections are secure and free of leaks.
Refill the radiator and engine block with the appropriate coolant mixture. Be sure to follow the manufacturer's recommendations for coolant type and mixture.
If necessary, bleed the cooling system to remove any air pockets. This can usually be done by running the engine with the radiator cap off until the thermostat opens and coolant circulates.
Start the engine and allow it to reach operating temperature. Check for leaks around the water pump and ensure that the engine is cooling properly.
After installation, monitor the water pump for any signs of leaks or unusual noises during initial operation. Regularly check the coolant level and condition as part of your maintenance routine.


Working on a hot engine poses severe burn risks from pressurized hot coolant. Allowing the engine to cool down ensures safety and prevents potential warping of engine components when cold parts are introduced.
Yes, if the new pump requires a standard paper gasket, a thin, even layer of gasket sealant can help secure a leak-free seal. If the water pump uses a rubber O-ring, make sure it is correctly seated; usually, O-rings do not require extra sealant unless specified by the manual.
Using a torque wrench prevents overtightening, which can strip threads, shear bolts, or crack the water pump housing. Under-tightening can lead to coolant leaks. Always refer to your engine manual for exact torque specifications.
Bleeding removes trapped air pockets in the cooling system. Air pockets can cause localized engine overheating, poor heating performance, or inaccurate thermostat readings. Running the engine with the radiator cap off is a common method to release trapped air.
You should check for leaks and abnormal noises immediately after the engine reaches operating temperature. It is also recommended to monitor coolant levels daily for the first week of operation to catch any potential leaks early.